How to Upload Files to a Server with Plain JavaScript and PHP
Writing the code to upload images to a server from scratch seems like a very daunting task. I'm going to make a very simple upload form to demonstrate how file data works and can be transferred.
In this tutorial, we're going to build an upload form with HTML, send the files with JavaScript, and process and upload them with PHP.
Note that this is not meant to be fully functional, secure, validated, production code. It is simply meant to demonstrate in a simple and straightforward manner how to make your first upload form.
Prerequisites
- A basic knowledge of HTML
- A basic knowledge of PHP syntax and code structure
- An understanding of local PHP environments. If you don't know what that means, please read this guide on how to set up a MAMP environment.
Goals
- Build the simplest possible form with HTML to take a retrieve files from your local computer.
- Send the data from an HTML form to a PHP script with vanilla JavaScript.
- Process the data in the PHP script and move the local files to an uploads/ directory on a server.
Setup
As mentioned in the prerequisites, you must have a basic knowledge of PHP and local server environments.
If you already know how to use PHP and local environments, skip to the next section.
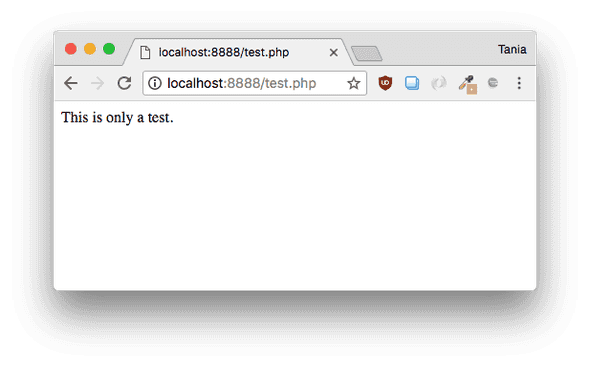
If you're using a Mac, you can create a server with a single command. To test this, create a file called test.php in the directory of your choice. I'm going to create a directory called local. The full path will be Users/tania/local.
<?php echo 'This is only a test.';In the Terminal application, which I'll open by pressing SPACEBAR + COMMAND and typing Terminal, navigate to the directory you created your file in.
cd server
php -S localhost:8888
You should now be able to go to http://localhost:8888/test.php and see the output of the code.
If you're on Windows, or you don't want to use the command line, set up MAMP.
Building an Upload Form in HTML
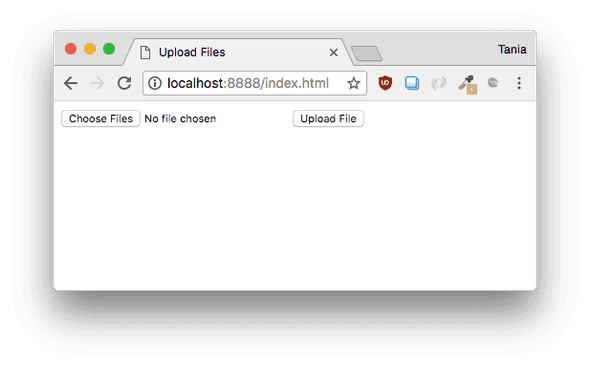
In the root of your local server, create an index.html file. We'll just create a quick skeleton.
<!DOCTYPE html>
<html lang="en">
  <head>
    <meta charset="UTF-8" />
    <meta name="viewport" content="width=device-width, initial-scale=1.0" />
    <meta http-equiv="X-UA-Compatible" content="ie=edge" />

    <title>Upload Files</title>
  </head>

  <body>
    <!-- form goes here-->
  </body>
</html>
Let's add an HTML web form to the body.
<form method="post" enctype="multipart/form-data">
  <input type="file" name="files[]" multiple />
  <input type="submit" value="Upload File" name="submit" />
</form>
In this form, we're using the POST HTTP method, which how we send data. The multipart/form-data value is required for uploading files in forms.
From here, we're creating a file input type that takes an array of files (files[]) and we're specifying multiple to allow more than one file to be selected. files[] can have any name - you could use uploads[] or images[], but I called it files[] for simplicity.
Finally, we have a submit button. Since the next step will be to add a script, let's just add a link to the JavaScript file we'll create.
<script src="upload.js"></script>And that's all we need for the view.
<!DOCTYPE html>
<html lang="en">
  <head>
    <meta charset="UTF-8" />
    <meta name="viewport" content="width=device-width, initial-scale=1.0" />
    <meta http-equiv="X-UA-Compatible" content="ie=edge" />

    <title>Upload Files</title>
  </head>

  <body>
    <form method="post" enctype="multipart/form-data">
      <input type="file" name="files[]" multiple />
      <input type="submit" value="Upload File" name="submit" />
    </form>

    <script src="upload.js"></script>
  </body>
</html>
Sending Form Data via JavaScript
Right now, clicking submit on the form doesn't go anywhere. Since we don't have an action that leads to a URL, the form will just post to itself by default. Since index.html is an html file, not a PHP file, no form processing can happen on this page. Instead, we'll send the form to PHP through JavaScript.
Create a file called upload.js.
First, let's define two variables - the URL where we want to send the data, and the DOM element for the form.
// Define processing URL and form element
const url = 'process.php'
const form = document.querySelector('form')
We're going to add an event listener to watch for the form being submitted, but we'll prevent the default action from firing.
// Listen for form submit
form.addEventListener('submit', (e) => {
  e.preventDefault()

  // ...
})
Let's gather the files with the .files property, and begin a new FormData() interface.
// Gather files and begin FormData
    const files = document.querySelector('[type=file]').files;
    const formData = new FormData();
});

// ...
For each file that has been submitted, append it to the files[] array.
// Append files to files array
for (let i = 0; i < files.length; i++) {
  let file = files[i]

  formData.append('files[]', file)
}

// ...
Finally, use the built-in Fetch API to POST the data to the URL we specified. Print the response to the console (for testing purposes).
fetch(url, {
  method: 'POST',
  body: formData,
}).then((response) => {
  console.log(response)
})
Here is the completed upload.js.
const url = 'process.php'
const form = document.querySelector('form')

form.addEventListener('submit', (e) => {
  e.preventDefault()

  const files = document.querySelector('[type=file]').files
  const formData = new FormData()

  for (let i = 0; i < files.length; i++) {
    let file = files[i]

    formData.append('files[]', file)
  }

  fetch(url, {
    method: 'POST',
    body: formData,
  }).then((response) => {
    console.log(response)
  })
})
Now - how can we test if all this data is going through properly? Let's print out the file data.
Create a new file called process.php, and print out the contents of the superglobal array $_FILES, which will contain the data for all our files.
<?php print_r($_FILES);Once you have this file, attempt uploading a few files through the form. I made a phplogo.png and testfile1.txt to test with, and uploaded the file.
In Developer Tools, under the Console, you should see a response like this:
Developer Tools -> Console
Response {
  type: "basic",
  url: "http://localhost:8888/process.php",
  redirected: false,
  status: 200,
  ok: true, …
}
If you see status: 200, this means the file hit the proper URL and the URL exists.
Now in Developer tools, click on the Network tab. You should see the filename process.php. Click on the file, and click on Response. There, you should see the output of print_r($FILES). It will look something like this:
Developer Tools -> Network -> Response
[files] => Array
(
  [name] => Array
  (
    [0] => phplogo.png
    [1] => testfile1.txt
  )

  [type] => Array
  (
    [0] => image/png
    [1] => text/plain
  )

  [tmp_name] => Array
  (
    [0] => /private/var/xxx
    [1] => /private/var/yyy
  )

  [error] => Array
  (
    [0] => 0
    [1] => 0
  )

  [size] => Array
  (
    [0] => 16610
    [1] => 12
  )
)
Now we know the proper files, along with all their associated data, have gone through. Success!
Processing Form Data with PHP
Now that we're gathering all the files from the form and sending them to process.php with JavaScript, we have to move the file data with PHP.
First, we'll want to make sure the code only runs when a POST request hits the file.
<?php

if ($_SERVER['REQUEST_METHOD'] === 'POST') {
  // ...
}
We also want to make sure files have gone through.
if (isset($_FILES['files'])) {
  // ...
}
Create a directory in the root of your project called uploads. This directory will need to have 755 permissions to accept incoming files.
At this point, we'll create an array for errors, set the path of the directory where uploads should go, and set the approved extensions.
$errors = [];
$path = 'uploads/';
$extensions = ['jpg', 'jpeg', 'png', 'gif'];
Since the user can upload multiple files, we'll create an $all_files variable, get the number of files being uploaded, and make a for loop.
$all_files = count($_FILES['files']['tmp_name']);

for ($i = 0; $i < $all_files; $i++) {
    // ...
}
Now, for each file we'll get the file name, temporary file data, type, size, and extension.
$file_name = $_FILES['files']['name'][$i];
$file_tmp = $_FILES['files']['tmp_name'][$i];
$file_type = $_FILES['files']['type'][$i];
$file_size = $_FILES['files']['size'][$i];
$file_ext = strtolower(end(explode('.', $_FILES['files']['name'][$i])));

$file = $path . $file_name;
Now we can set a few rules for the files. If the file type in not in the approved list of extensions, or the file is too large, we'll add it to the error array. I set a file size of 2 megabytes.
if (!in_array($file_ext, $extensions)) {
    $errors[] = 'Extension not allowed: ' . $file_name . ' ' . $file_type;
}

if ($file_size > 2097152) {
    $errors[] = 'File size exceeds limit: ' . $file_name . ' ' . $file_type;
}
If there were no errors, we can go ahead and move the file to the uploads folder with the move_uploaded_file command.
if (empty($errors)) {
  move_uploaded_file($file_tmp, $file);
}
Now we can close out the for loop, and print out the errors. This will display for us in the network tab we used before to see the output of $_FILES.
if ($errors) print_r($errors);Put it all together, and here's process.php.
<?php

if ($_SERVER['REQUEST_METHOD'] === 'POST') {
    if (isset($_FILES['files'])) {
        $errors = [];
        $path = 'uploads/';
        $extensions = ['jpg', 'jpeg', 'png', 'gif'];

        $all_files = count($_FILES['files']['tmp_name']);

        for ($i = 0; $i < $all_files; $i++) {
            $file_name = $_FILES['files']['name'][$i];
            $file_tmp = $_FILES['files']['tmp_name'][$i];
            $file_type = $_FILES['files']['type'][$i];
            $file_size = $_FILES['files']['size'][$i];
            $file_ext = strtolower(end(explode('.', $_FILES['files']['name'][$i])));

            $file = $path . $file_name;

            if (!in_array($file_ext, $extensions)) {
                $errors[] = 'Extension not allowed: ' . $file_name . ' ' . $file_type;
            }

            if ($file_size > 2097152) {
                $errors[] = 'File size exceeds limit: ' . $file_name . ' ' . $file_type;
            }

            if (empty($errors)) {
                move_uploaded_file($file_tmp, $file);
            }
        }

        if ($errors) print_r($errors);
    }
}
Now test it out. If you use the form to upload some files, you'll see them in the uploads folder. If you try to upload a file that's too large or of the wrong type, you'll see the errors in the Network response.
Conclusion
Congratulations, you've successfully created a functioning upload form. This is an exciting little process if you've never successfully uploaded a file or used the $_FILES superglobal before.
The complete source is on GitHub.
Note that this is not a complete, secure, production process. Here are a few things to take into consideration:
- There is no JavaScript side validation. The user should be shown an error on the front end if their file is of the wrong type before they submit.
- Dealing with mutiple files with the same name.
- This method of error handling is only for the development process.
Thanks for reading. I can also make one about uploading to Amazon S3 and/or DigitalOcean Spaces if there's interest.


Comments